Tu carrito está vacío

How to make almond milk yoghurt
Barb Hodgens
Barb Hodgens loves to cook with alternative, healthy whole food ingredients, with a focus on gut health. Barb has overcome her own gut health issues through healthy eating. Share your ideas, comments and photos at the end of this post :)

Even nut milk can be made into gut loving yogurt.
Absolutely no one needs to miss out on the benefits of homemade, probiotic rich yogurt. Whether you're lactose intolerant, vegan, paleo or simply an everyday nut addict, almond milk yogurt is plant based alternative worth making.
Almond milk yogurt must be made from scratch, from actual nuts. There are no short cuts. Additives and preservatives in store bought almond milk may interfere with the yogurt fermentation process. Fortunately, making it at home in the Vibe Blender System is very simple. Find the recipe and method here.

THICKENING DAIRY-FREE YOGURT
Nut milk yogurt will not naturally thicken up while fermenting like traditional dairy yogurt. If you are like me and prefer a creamy tub set yogurt, a thickener is required. A premium powdered gelatin or agar agar are good options. Use the amount specified as a guide only. Add slightly more or less to achieve the yogurt texture you enjoy most.
A LITTLE BIT OF SUGAR PROMOTES GOOD BACTERIA.
Make sure your homemade nut milk has a little bit of sugar in it. Unlike animal milk, nut milk doesn’t naturally contain sugar. The Yogurt starter culture need something to feed on to allow the culturing process to take place. One teaspoon of sugar or one tablespoon of pasteurised honey is enough to kick start fermentation. Raw honey may have an antibiotic effect and is therefore not suitable for making yogurt. If honey was added when the nut milk was made, it is not necessary to add more.
STARTER CULTURE
You will need a yogurt starter culture or probiotic to introduce the fermentation of bacteria to your nut milk. Use the amount of starter culture indicated on the packet or one dose of probiotic. A comprehensive list of starter cultures is availablehere.

WATCH HOW ITS MADE HERE
HOW TO MAKE ALMOND MILK YOGURT STEP BY STEP
INGREDIENTS
Approximately 4 cups of homemade almond milk
Yogurt starter culture or probiotic capsule
1 tablespoon of premium gelatin powder or 1 teaspoon of powdered agar agar
1 teaspoon of white sugar or 1 tablespoon of pasteurised honey (if sweeter was not added when the homemade nut milk was made)
METHOD
1. Thoroughly wash or sterilize your yogurt making jar, whisk and other utensils with boiling water.
2. Pour a quarter of a cup of almond milk into a small bowl.
3. Add the thickening powder of choice and whisk to combine. (1 tablespoon of gelatin powder or 1 teaspoon of agar agar) and set aside for 5 minutes. Note: Gelatin will swell and thicken.
4. Pour the remaining nut milk into saucepan then stir in the thickening mixture.
5. Place the saucepan of nut milk on the stove-top.
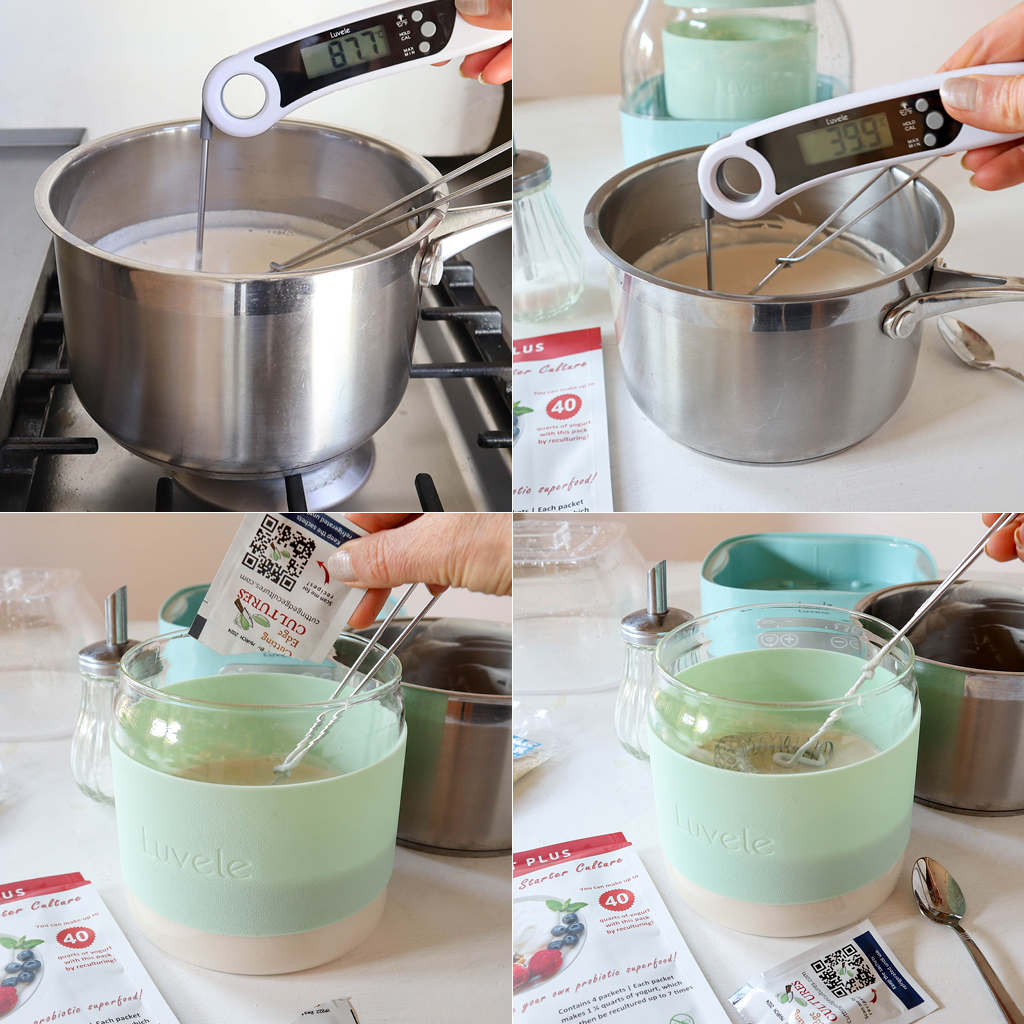
For Gelatin: Gently warm to 95⁰-104⁰F (35⁰- 40⁰C) to activate the gelatin. Stir with a wire whisk to ensure the gelatin has dissolved and is not settled at the bottom. Do not boil.
For Agar agar: Gently heat the almond milk to 190⁰F (87⁰C) and hold the temperature for 10 minutes. Do not boil. A double boiler can be helpful.
6. Remove from the heat, add the sugar or honey (if it wasn't included when making the almond milk)

7. Let cool to below 110° F (43° C). The temperature of the nut milk must be below 43° C before adding the starter culture.
8. Pour the nut milk into the yogurt making glass jar.
9. Add your preferred starter culture and gently whisk it in. Note: Each starter culture will come with different instructions. Please follow the instructions unique to the starter culture and use the amount specified.

10. Put the lid firmly on the glass yogurt jar and place into your yogurt maker.
11. Pour water slowly into the base. (The water must not be filled over the ‘tall line’ indicated on the inside wall of the maker). Then place the cover lid on top.
12. Use the digital control panel to set the temperature to 38° C, the time to 24 hours (depending on your desired tartness) and then press ‘confirm’ to begin incubation.
13. After 24 hours the fermentation is complete. Turn the yogurt maker off. Remove the Luvele Yogurt Maker lid and gently lift out the glass jar.

13. Straight from the yogurt maker, the almond milk yogurt will be warm and may look curdled and separated. Do not worry.
14. Place the jar in the fridge for at least 6 hours or overnight to set.
15. When chilled, whisk by hand or with a stick blender to achieve a creamy consistency.
16. Serve and enjoy
PIN THIS RECIPE

LOOKING FOR MORE NON-DAIRY YOGURT INSPIRATION?
Suscríbase
Regístrese para recibir las últimas novedades de ventas, lanzamientos y más...
Item is added to cart

